Edge Collective
Greenhouse Monitoring, 'Full Stack'
Instructions for End-to-End Greenhouse monitoring stack(((Status: DRAFT)))
Overview
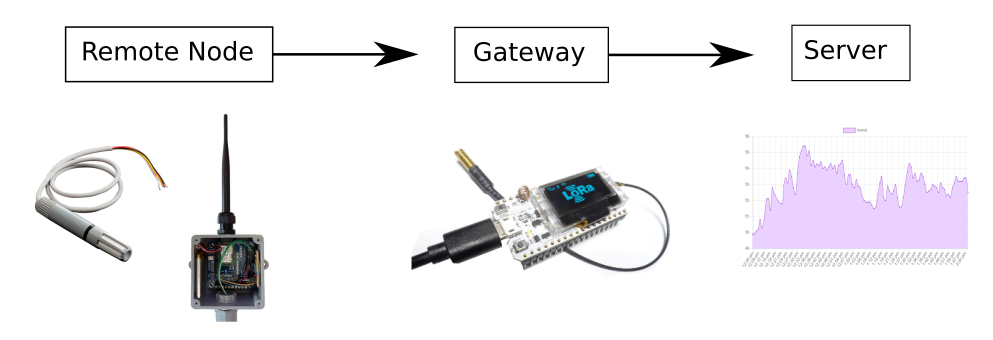
Here we're going to be describing how to set up a basic 'Greenhouse Monitoring' system, which consists of three main parts:
 |
|---|
| Overview of the flow of data in the greenhouse monitoring 'stack'. |
- Remote Node -- consisting of a microcontroller + sensor, that captures a signal (e.g. temperature) and relays this data via low-power radio to a wifi gateway
- Gateway -- which relays this incoming sensor data to a server
- Server -- a server which receives data from the gateway and stores it in a database.
Table of Contents
1. Server setup
We will be covering two different server options:
- FarmOS (an open source farm data management system); and
- Bayou (an open source sensor data cooperative).
FarmOS
You can watch a short video (~ 3 min) on setting up a FarmOS sensor feed here.
The process will generate a public key + private key pair, and indicate a URL to which you can post sensor data via JSON (See "Sensor Configuration": "Developer Information"). The URL format looks like this:
https://edgecollective.farmos.net/farm/sensor/listener/[public key]?private_key=[private key]
For example, a typical URL with the keys actually inserted looks like this:
https://edgecollective.farmos.net/farm/sensor/listener/0ce692a8fd8474137839535dd7997a28?private_key=ba0c7dbfd4321b3abaa7851457dc12ef
Find this URL (with the keys inserted) for your sensor feed, and take note of it (keep the relevant FarmOS browser tab open, or copy-paste this URL into a text file.) It will be used in the Gateway Setup section below.
Bayou
Another option is to use the Bayou cooperative sensor data platform. This donation-based data service allows users to set up free sensor data feeds. Email collaborate at edgecollective dot io to request a password.
You can watch a short video on setting up a Bayou sensor feed here.
The basic steps are:
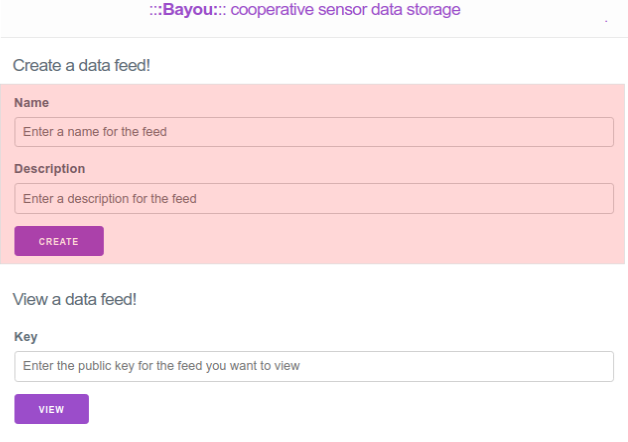
- Visit Bayou. There may be a 'username' and 'password' required to access the site -- contact collaborate@edgecollective.io to request a login!
 |
|---|
| The Bayou main site. |
- To create a new data feed, enter new values for your feed in the 'name' and 'description' fields, and click Create.
 |
|---|
| Create a new data feed on Bayou by entering a 'name' and 'description' for the feed, and then pressing the 'Create' button. |
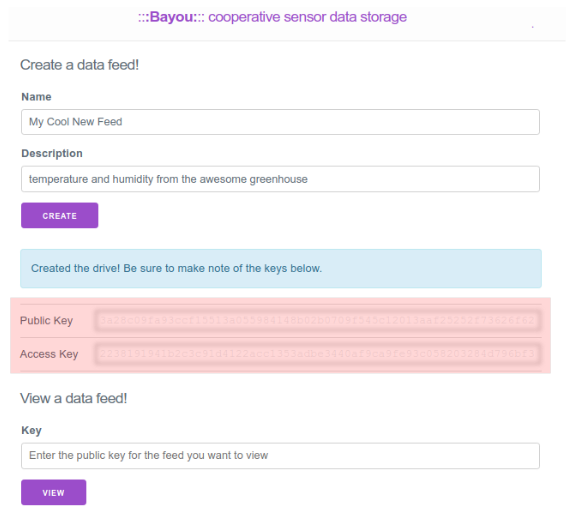
- This will generate a public key and a private key.
IMPORTANT: Take note of these keys! Copy them to a separate text file for safekeeping -- you will use them in your gateway configuration file in the Gateway Setup step below.
 |
|---|
| After clicking 'create', you'll be shown a Public Key and Private Key. Take note of these! |
- To view a feed you've created, enter the public key into the 'View a data feed!' section, in the 'key' field, and click View.
 |
|---|
| To view a feed you've created, enter the public key into the 'View a data feed!' section, in the 'key' field, and click View. |
2. Setting up the Arduino IDE
In order to load firmware onto the Remote Node and the Gateway, we'll need to set up the Arduino IDE to program the Feather M0 (for the Remote node, which uses a Feather M0 LoRa), and an ESP32-based device (for the Gateway, which uses an ESP32-based Heltec device).
(You can download the Arduino IDE for your operating system here.)
We can configure the Arduino IDE to talk to these boards using the instructions below.
In the Arduino IDE, go to File: Preferences menu. You will see an "Additional Boards Manager URLs" dialog box:
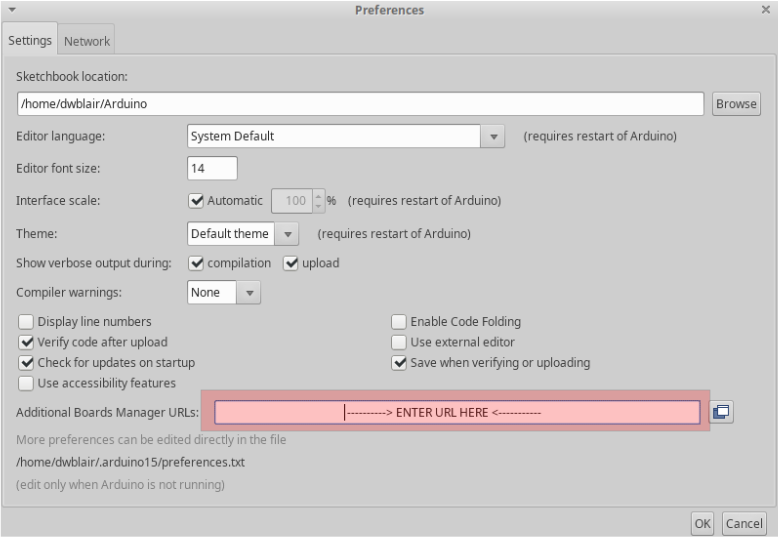
Enter the following URLS into this dialog box (note, this contains two URLs separated by a comma):
https://adafruit.github.io/arduino-board-index/package_adafruit_index.json, https://adafruit.github.io/arduino-board-index/package_adafruit_index.json
After entering them, it might look something like this:

Hit "OK".
Now go to "Tools: Board: Boards Manager" menu.
(Note that the following installation process can take several minutes for each board setup.)
You need to install functionality for:
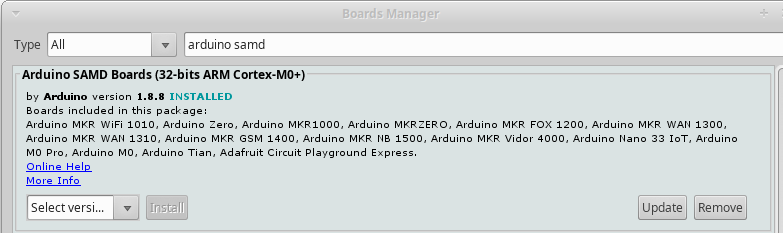
- The Arduino SAMD board definitions (search, and click 'Install'):
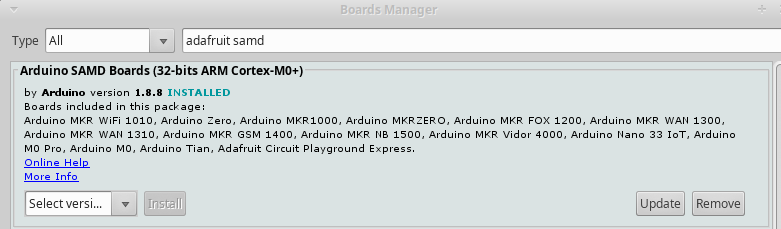
- the Adafruit SAMD board definitions (search, and click 'Install'):
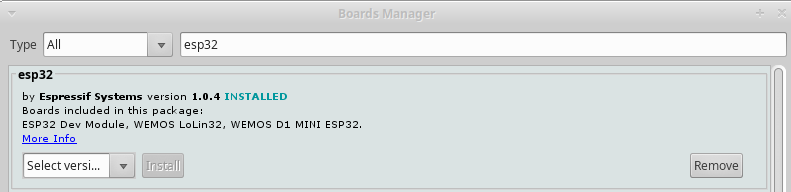
- and the ESP32 board definitions (search, and click 'Install'):
3. Remote Node setup
In our example setup for this guide, the Remote node consists of:
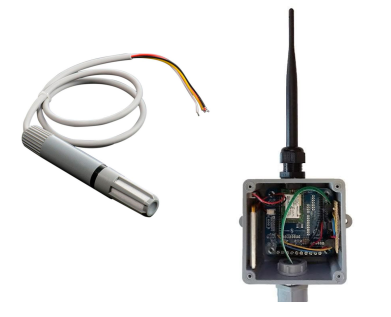
- Sensor: an AM2315 Temperature and Humidity Sensor
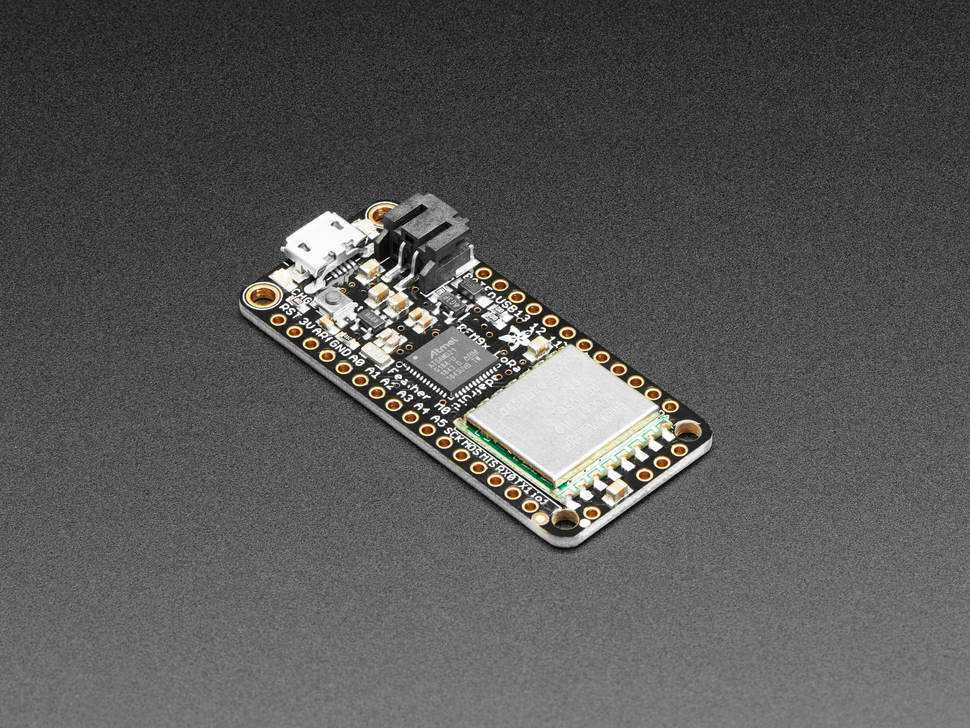
- Microcontroller: a Feather M0 LoRa
- Additional Hardware: a PVOS Greenhouse Motherboard Version 4 or Version 5.
Configuring the Arduino IDE to program Feather M0 LoRa
-
Board selection. From the Arduino IDE Tools menu, select: "Tools:Board:Adafruit SAMD:Adafruit Feather M0"
-
Port selection. From the Arduino IDE Tools: Port menu, select the port to which your Feather M0 is connected via USB.
Assembling the Remote Node
The Remote Node requires the following hardware:
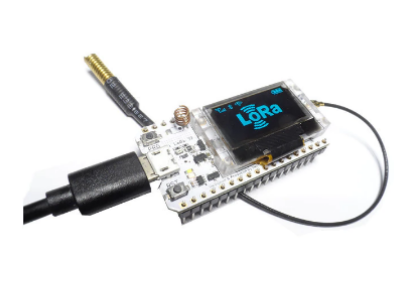
- a Feather M0 LoRa (link allows purchase via Adafruit, Digikey, or etc.):
 |
|---|
| a Feather M0 LoRa, for sale by Adafruit |
NOTE: you'll need to choose a Feather M0 LoRa radio band (433 MHz or 868/915 Mhz) that matches the frequency of your LoRa-WiFi gateway.
- an AM2315 Temp + Humidity sensor (purchase via Adafruit, Digikey, or etc.):
 |
|---|
| an AM2315 Temp + Humidity sensor, for sale by Adafruit |
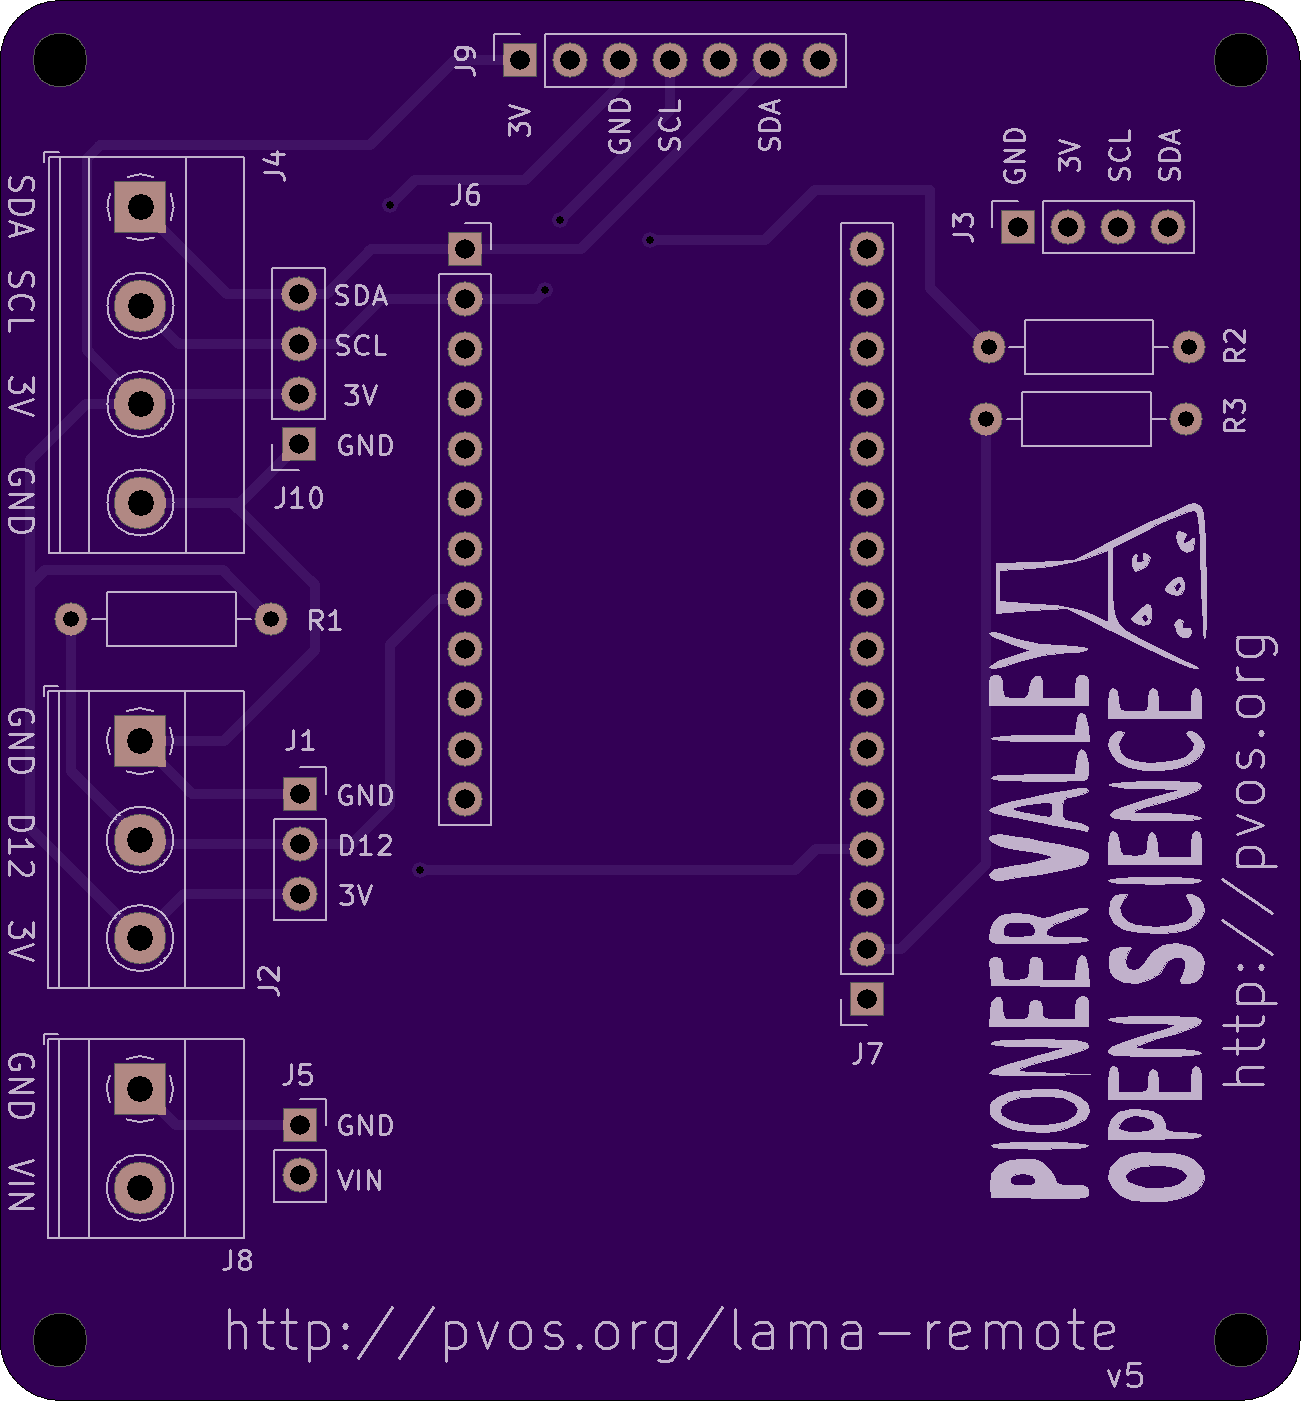 |
|---|
| A PVOS 'Lama' Board Ver 5, available via OSHPARK. |
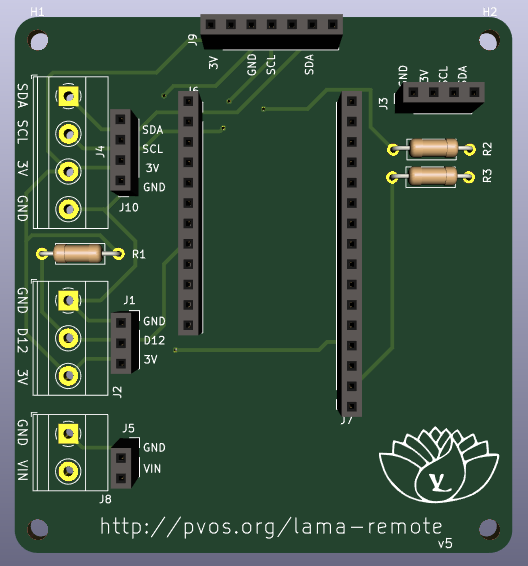 |
|---|
| A PVOS 'Lama' Board Ver 5 rendered with headers soldered (but not yet the screw terminals). |
A can be purchased directly from OSHPARK or by sending the [design files] to PCB manufacturers like JLCPCB, etc.
NOTE: some simple hand-soldering (beginner level) and wire stripping is required.
Connecting the sensor
The AM2315 is an i2c sensor -- which means that it has the following wires:
- VCC / 3.3V (Red)
- GND (Black)
- SCL (White)
- SDA (Yellow)
These wires should connect to the relevant screw terminal inputs on the "Version 4 Motherboard", as depicted here:
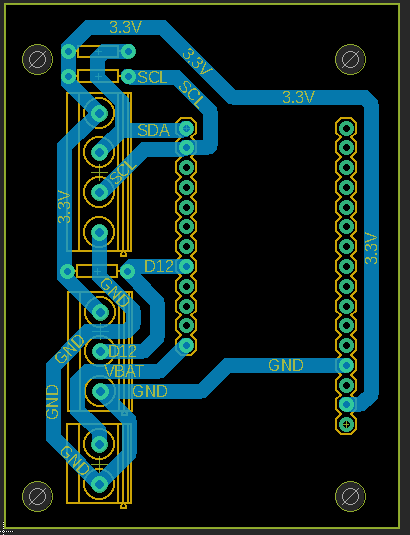 |
|---|
| Remote board, version 4. |
The Feather M0 LoRa should be plugged into the relevant headers on the mothboard, as well.
Note that all resistors (4.7K or 10K) should also be soldered to the board.
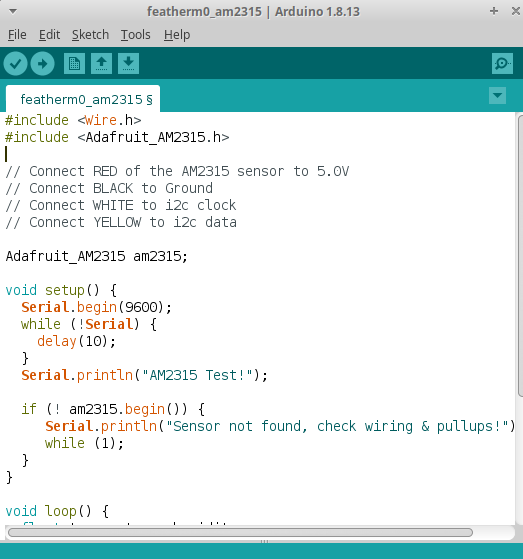
Sensor Test
Code for testing the AM2315 with the Feather is here.
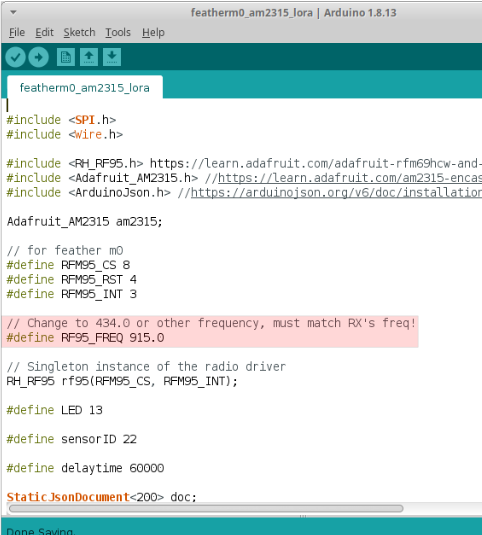
Radio Setup
Code for measuring the AM2315 and sending it via LoRa is here.
Note: you'll need to modify the code to match the radio frequency you're using:
Code for adding sleep functionality is here.
4. Gateway setup
The gateway we'll be using is a 'Heltec Wifi-LoRa 32 v2', it is available widely online, including here. No soldering is required.
Configuring the Arduino IDE to program Heltec ESP32-LoRa V2
After the initial setup process described above for configuring the Arduino IDE to work with the Heltec and Feather device, you can easily select the proper Port and Board settings in the Arduino IDE as follows:
-
Board selection. From the Arduino IDE Tools menu, select: "Tools:Board:ESP 32 Arduino:Heltec Wifi LoRa (V2)"
-
Port selection. From the Arduino IDE Tools: Port menu, select the port to which your Heltec is connected via USB.
Uploading Gateway Firmware
Sample code for your esp32-lora gateway is here. You should download this folder and open it up in the ArduinoIDE.
First, set up the configuration file, configuration.h, which is located in your gateway arduino code folder. If you open the folder in the Arduino IDE, configuration.h should open automatically in a separate tab. Click on that tab in order to edit your credentials.
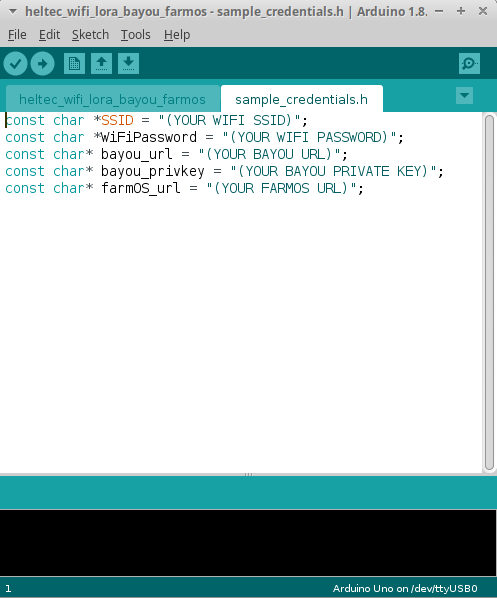
The configuration.h file has the following fields:
const char *SSID = "(YOUR WIFI SSID)";
const char *WiFiPassword = "(YOUR WIFI PASSWORD)";
const char* bayou_url = "(YOUR BAYOU URL)";
const char* bayou_privkey = "(YOUR BAYOU PRIVATE KEY)";
const char* farmOS_url = "(YOUR FARMOS URL)";
Setting up wifi
In the credentials.h file, you'll see a place to enter your wifi credentials. For example, if your wifi's name were 'Nancy' and your password were 'Drew1234', you'd edit the configurations.h file to look like the following:
const char *SSID = "Nancy";
const char *WiFiPassword = "Drew1234";
const char* bayou_url = "(YOUR BAYOU URL)";
const char* bayou_privkey = "(YOUR BAYOU PRIVATE KEY)";
const char* farmOS_url = "(YOUR FARMOS URL)";
Setting up Bayou credentials
If you're posting to Bayou, you'll want to use the Bayou publickey and private you created above, and enter them into the configuration.h file.
For examle, if your Bayou public key / private key pair (generated in the server setup above) were:
public key: 1a142aee9702045f3049325318f14fab10d24ce3e0c8a387d092759c0594ba53
private key: db84537367d8e9026e93b97cfef3adc11781d90abb56f24d96ee12e7ce899344
Then your 'bayou_url' is formed by pre-pending http://157.230.188.100:3000/api/drives/ to your public key, and your bayou_privkey is simply your private key.
In our example, you'd modify the configuration.h file to look like this:
const char *SSID = "(YOUR WIFI SSID)";
const char *WiFiPassword = "(YOUR WIFI PASSWORD)";
const char* bayou_url = "http://157.230.188.100:3000/api/drives/1a142aee9702045f3049325318f14fab10d24ce3e0c8a387d092759c0594ba53";
const char* bayou_privkey = "db84537367d8e9026e93b97cfef3adc11781d90abb56f24d96ee12e7ce899344";
const char* farmOS_url = "(YOUR FARMOS URL)";
(Note, you don't need to modify the FarmOS parameters in configuration.h if you're not posting to FarmOS.)
NOTE: you must rename "sample_configuration.h" to "configuration.h"!
Setting the LoRa frequency
Next, you'll need to modify the LoRa radio frequency to match your setup:
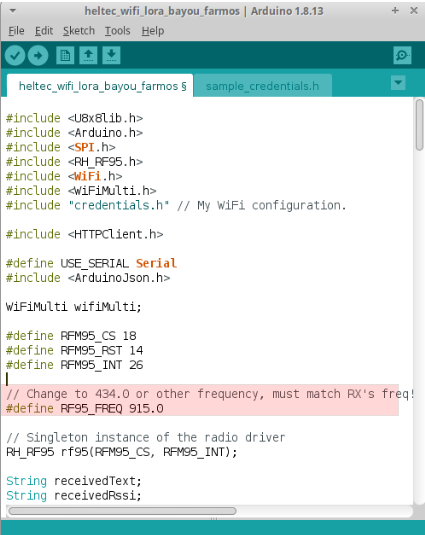
NOTE: As of this writing, the code only works with either Bayou or FarmOS. You may need to comment the relevant other upload section accordingly.
Finally, click on the 'upload' button.
You should expect to see your device connecting to your wifi, then receiving data from the Feather and posting it to Bayou / FarmOS.
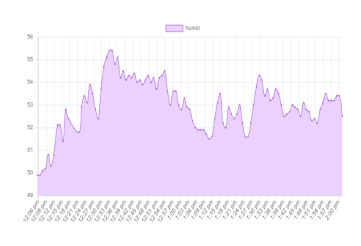
Example data
Example of Bayou server data here